
In the realm of iOS app development, mastering SwiftUI alert essentials is crucial for crafting intuitive and responsive user interfaces. Alerts are a fundamental component in SwiftUI, offering developers a powerful tool to facilitate user interactions. Whether it’s for confirmation messages, input requests, or guiding user flows, understanding SwiftUI alerts is essential for any developer looking to enhance their app’s functionality.
This guide is tailored for developers at all levels, from beginners just starting with SwiftUI to seasoned experts seeking to refine their skills. Let’s embark on a journey to transform your proficiency with SwiftUI alert essentials, ensuring your apps deliver exceptional user experiences.
Before the Dive
Firstly, let’s briefly explore what comprises a new SwiftUI project in Xcode.
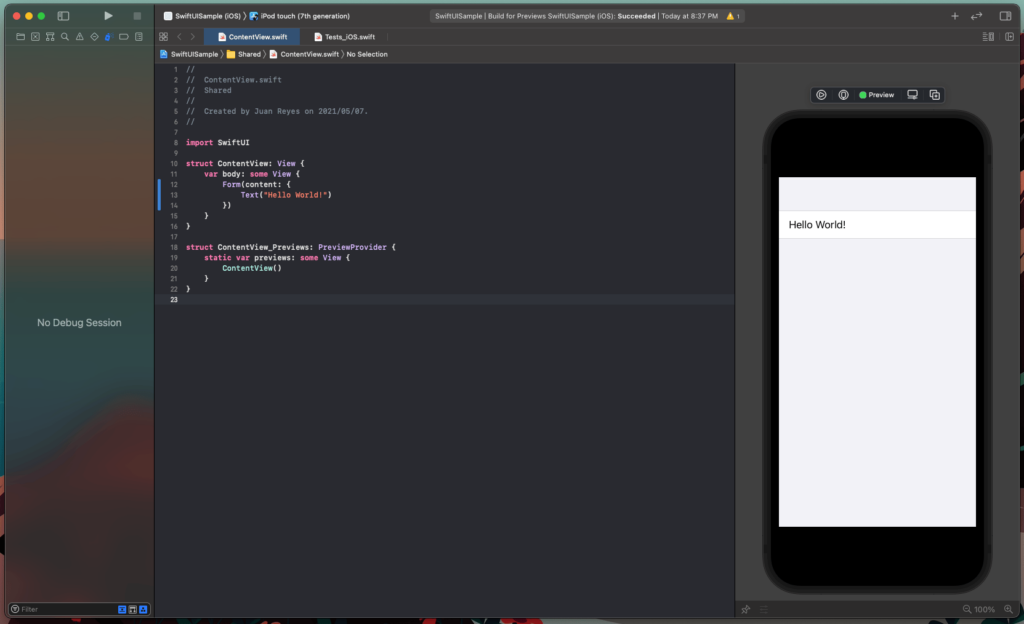
When you create a new SwiftUI project, you will be able to see that your base project contains some files in it. A ContentView.swift class file and an <APP_NAME>App.swift class file. Don’t worry; they are pretty simple to understand.
SwiftUI View files have equivalent structures:
- A ContentView that defines the design of the View.
- A PreviewView to display the code in the previewer.
To modify the View, put your code in the “body” variable to add more views or elements. For example, you can see a TextView object with a “Hello World!”. We will be working there.
Now that that is clearer let’s dive into our sample project.
SwiftUI Alert Essentials
Let’s begin by creating a simple form so the user can input information and interact with our application.
How do I add a form? Simply wrap our element in a Form view like this.
import SwiftUI

struct ContentView: View {
    var body: some View {
        Form(content: {
            Text("Hello World!")
        })
    }
}
This will end up looking like the following.
Well, that doesn’t look much like a form, does it?
Not really. But we will get there.
Let’s embed our Form in a NavigationView and add a heading so it looks cleaner.
import SwiftUI

struct ContentView: View {
    var body: some View {
        NavigationView {
            Form(content: {
                Text("Hello World!")
            })
            .navigationBarTitle("Alert Me Form")
        }
    }
}
Alright, that looks a bit cleaner. What’s next?
Adding State to SwiftUI Alert
We must add fields so the user can input data and interact with the app. You can replace the Hello World Text element with a TextView element inside the Form.
import SwiftUI

struct ContentView: View {
    @State var name: String = ""

    var body: some View {
        NavigationView {
            Form(content: {
                // Name Text field
                TextField("Name", text: $name)
            })
            .navigationBarTitle("Alert Me Form")
        }
    }
}
You might be wondering what that variable prefixed by @State is.
Variables prefixed with a @State directive are ‘state’ variables that persist values and are accessible throughout the lifespan of the View. For example, in this case, state variables are needed for form elements to hold the user information (name) and the state of elements (showingAlert).
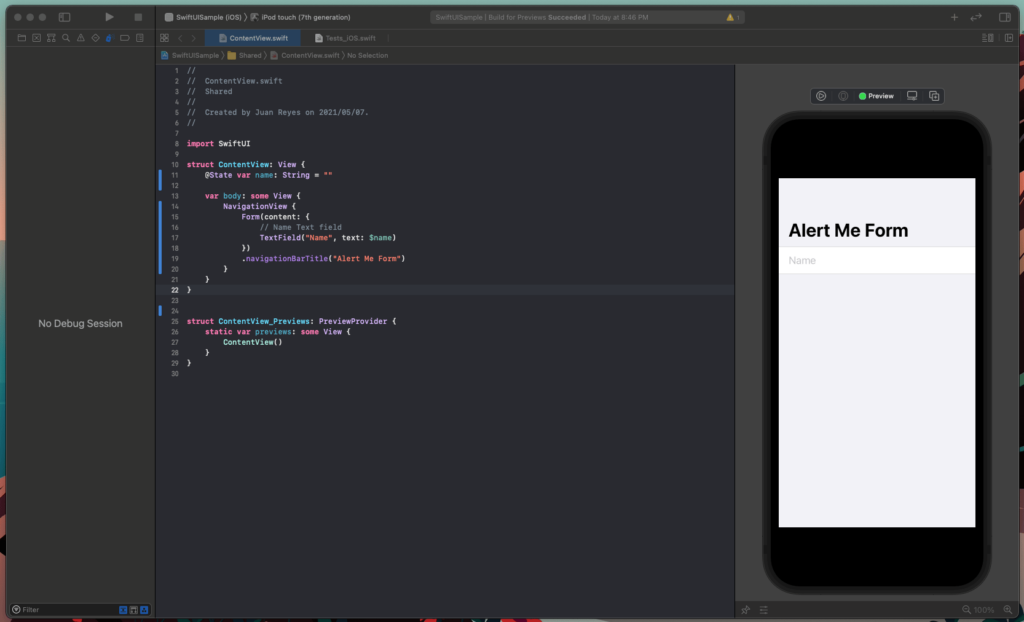
You can see now that the field is displayed correctly inside the Form. You can even interact with it in the previewer by clicking the play button on top of the device emulator.
Great! But we need to add a button so the user can submit their input, and we can finally show our alert.
import SwiftUI

struct ContentView: View {
    @State var name: String = ""

    var body: some View {
        NavigationView {
            Form(content: {
                Section {
                    // Name Text field
                    TextField("Name", text: $name)
                }
                Section {
                    // Submit button
                    Button(action: {
                    }, label: {
                        Text("Alert me!")
                    })
                }
            })
            .navigationBarTitle("Alert Me Form")
        }
    }
}
Notice that I segregated the elements into Segments, which help organize the fields inside a form.
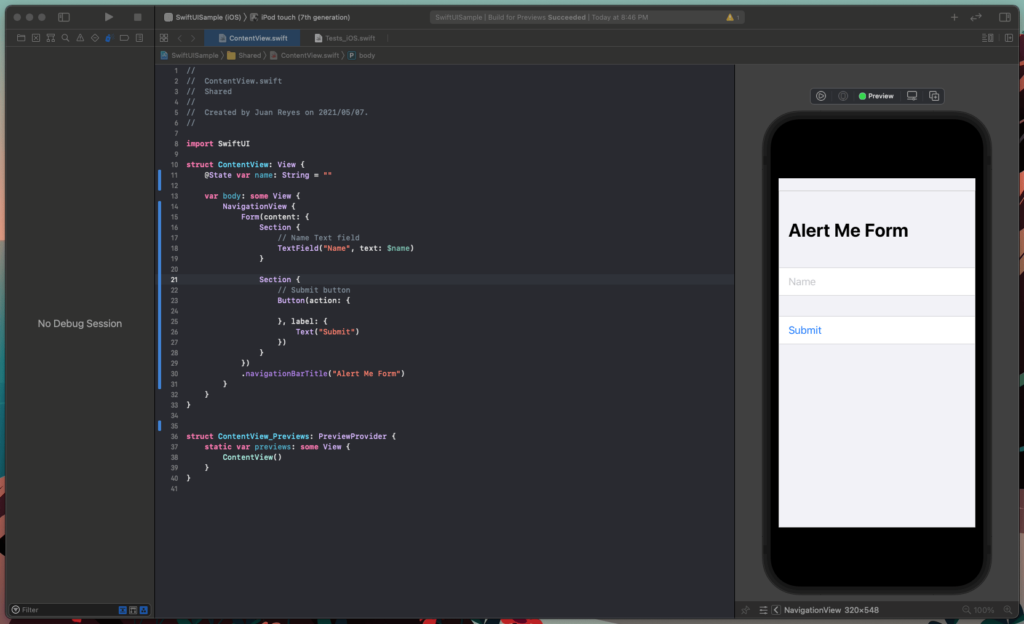
With the fields separated, it all looks much better.
We can now add our alert and link it to the submit button to show when it is tapped.
import SwiftUI

struct ContentView: View {
    @State private var showingAlert = false
    @State var name: String = ""

    var body: some View {
        NavigationView {
            Form(content: {
                Section {
                    // Name Text field
                    TextField("Name", text: $name)
                }
                Section {
                    // Submit button
                    Button(action: {
                        showingAlert = true
                    }) {
                        Text("Alert me!")
                    }
                    .alert(isPresented: $showingAlert) {
                        Alert(title: Text("Alert!"),
                              message: Text("You have been alerted.\nThank you \(name)"),
                              dismissButton: .default(Text("OK")))
                    }
                }
            })
            .navigationBarTitle("Alert Me Form")
        }
    }
}
Notice that the alert is added directly to the button with a modifier. A modifier is simply a method that expands the view appearance or functionality. If you want to go deeper, please check here.
This modifier requires a binding state variable to inform the View if the alert is displayed. To pass a binding variable, append a ‘$’ character to the beginning of the variable name. By doing this, the value of this variable will be updated automatically every time the alert is displayed or dismissed.
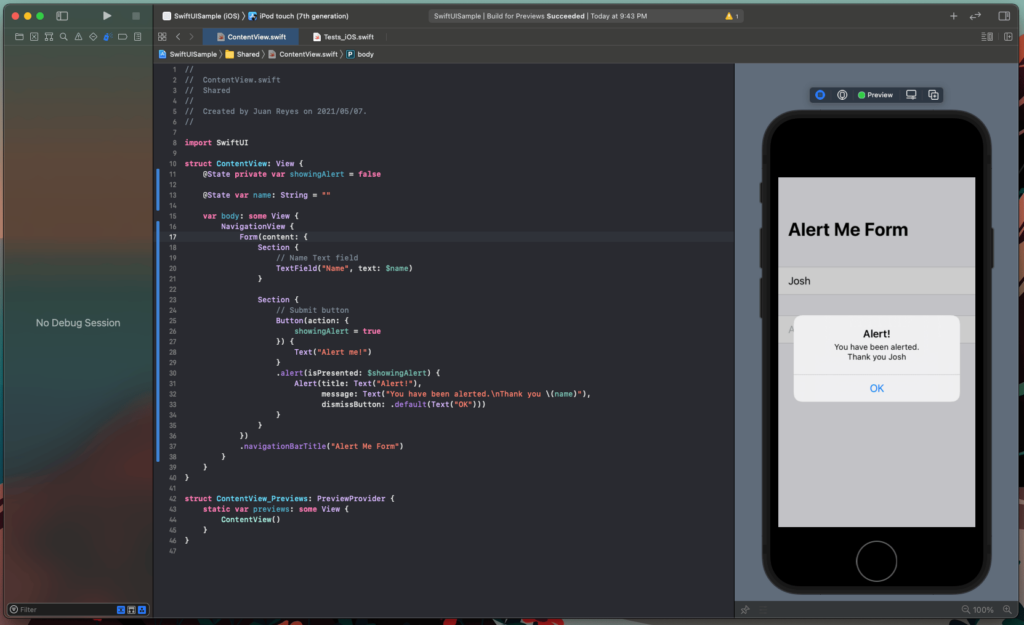
When you input some value in the text field and tap the “alert me!” button, the alert displays as expected.
Appending Functionality to Our Alert
Sometimes, you must add a specific behavior when an alert is dismissed or your alert is intended to get some input from the user.
To do this, you can add a closure to the button itself in the alert constructor.
import SwiftUI

struct ContentView: View {
    @State private var showingAlert = false
    @State var name: String = ""

    var body: some View {
        NavigationView {
            Form(content: {
                Section {
                    // Name Text field
                    TextField("Name", text: $name)
                }
                Section {
                    // Submit button
                    Button(action: {
                        showingAlert = true
                    }) {
                        Text("Alert me!")
                    }
                    .alert(isPresented: $showingAlert) {
                        Alert(title: Text("Alert!"),
                              message: Text("You have been alerted.\nThank you \(name)"),
                              primaryButton: .default(Text("OK")) {
                                name = ""
                              },
                              secondaryButton: .cancel())
                    }
                }
            })
            .navigationBarTitle("Alert Me Form")
        }
    }
}
Notice that the constructor used for this is different from the one-button alert.
When you press the OK button, the text field is cleared.
Customizing Our Alert Appearance
Now that you have a form with the alert functionality let’s explore how we can customize our alert appearance.
There are several alert constructors at our disposal.
Alert(title: Text("Alert!"))

Alert(title: Text("Alert!"),
      message: Text("You have been alerted.\nThank you \(name)"),
      dismissButton: .default(Text("OK")))

Alert(title: Text("Alert!"),
      message: Text("You have been alerted.\nThank you \(name)"),
      primaryButton: .default(Text("OK")),
      secondaryButton: .cancel(Text("Cancel")))

Alert(title: Text("Alert!"),
      primaryButton: .default(Text("OK")),
      secondaryButton: .cancel(Text("Cancel")))
All of them are a slight variation of the default alert with an extra button or no description text. You can proceed to test them all and see how it displays.
But what if I want to have more than two buttons?
Well, unfortunately, as of yet, there is no way to do that in an alert. However, there is another view better suited for this kind of need. ActionSheets.
To implement an ActionSheet, replace the ‘alert’ modifier for the ‘actionsheet’ modifier like this.
import SwiftUI

struct ContentView: View {
    @State private var showingAlert = false
    @State var name: String = ""

    var body: some View {
        NavigationView {
            Form(content: {
                Section {
                    // Name Text field
                    TextField("Name", text: $name)
                }
                Section {
                    // Submit button
                    Button(action: {
                        showingAlert = true
                    }) {
                        Text("Alert me!")
                    }
                    .actionSheet(isPresented: $showingAlert) {
                        ActionSheet(title: Text("Alert!"),
                                    message: Text("You have been alerted.\nThank you \(name)"),
                                    buttons: [
                                        .default(Text("One")) { },
                                        .default(Text("Two")) { },
                                        .default(Text("Three")) { },
                                        .cancel()
                                    ])
                    }
                }
            })
            .navigationBarTitle("Alert Me Form")
        }
    }
}
As you can see, you now have more latitude to add buttons and functionalities to the Form.
You can find more information here if you want to have even more control over the alerts.
Don’t Forget to Test
We can only finish this article by introducing proper testing into our project. Don’t worry. With SwiftUI and XCTest, doing tests has always been more complex.
First, find the Tests_iOS.swift file and replace the testExample method with this code.
func testExample() throws {
    // UI tests must launch the application that they test.
    let app = XCUIApplication()
    app.launch()

    app.textFields["Name"].tap()
    app.textFields["Name"].typeText("Josh")
    app.textFields["Name"].typeText("\n")

    app.buttons["Alert me!"].tap()

    XCTAssertTrue(app.alerts["Alert!"].waitForExistence(timeout: 1))
    XCTAssert(app.alerts["Alert!"].staticTexts["You have been alerted.\nThank you Josh"].exists)
    // Use recording to get started writing UI tests.
    // Use XCTAssert and related functions to verify your tests produce the correct results.
}
That is all!
Now, execute the test and see how the alert behaves.
Staying Alert
Creating user interfaces that are interactive and well-designed is a challenge that continues to evolve. For SwiftUI and all things Apple, the tools at our disposal have never been more convenient and approachable for newcomers while staying flexible and extendable for the veterans who need more control.
Nevertheless, it is always essential to keep our knowledge sharp and updated to take advantage of the advances the platform is making in the market. So stay hungry for learning, curious for novelty, and alert for change.
This post was originally written for and published by Waldo.com
Cover photo by Markus Spiske on Unsplash
Leave a Reply